Hello guys, are you looking for an easy and good to use screen recording tool? Today I’d like to share with you a powerful but very easy-to-use screen recording program: Aiseesoft Screen Recorder. Keep reading to check what you can expect from this easiest but functional screen recording tool.

What Contents Aiseesoft Screen Recorder Can Record?
I must say that after my test of Aiseesoft Screen Recorder, it can do almost all the screen recording tasks on the computer.
Capture Online Videos
If you cannot download a video from any popular video sites like YouTube, Facebook, Vimeo, DailyMotion, TED, etc., Aiseesoft Screen Recorder can help you record it easily.
Record Games
Aiseesoft Screen Recorder can help you record the amazing and exciting moment of your games for sharing with your friends.
Record Online Conferences
If you have online meetings with your colleagues, you can use this screen recording tool to record the whole meeting with speech of all parties.
Record Music
This screen capture tool can record any songs played on your computer, whether it’s the music stored on your computer or from streaming sites/music radio.
Record Lectures, Webcam Videos, Make Video Turials, and more
You can also use Aiseesoft Screen Recorder to record an inspiring lecture, save webcam videos on your computer like Skype calls, make video tutorials to deliver your thoughts more clearly, etc.
How to Use Aiseesoft Screen Recorder?
Aiseesoft Screen Recorder has both Windows and Mac versions, you can download the correct version for your computer from their official website to experience its full functions.
Adjust Recording Preferences before Recording
Before getting started, I suggest you go to Menu and select Preferences to adjust the settings according to your habit in order to get a desired recording.
In the Preferences window, you can make adjustments to Recording, Mouse, Hotkeys, Output and Others (hardware acceleration, automatic updates and more) as you like.

Record Video/Audio
Step 1. After you launch Aiseesoft Screen Recorder on your computer, click “Video Recorder” option to enter the Video Recorder window. If you only need to record audio, just click the Audio Recorder option. Then you can skip step 2 and check step 3 directly.

Step 2. In the Video Recorder window, set the recording area as full screen or a fixed screen like 1920*1080, 1280*720, 854*480, 1024*768, 640*480, or you can customize the recording area with your cursor as per your need.

Step 3. Select the audio source as System Sound or Microphone or both based on your demand.

Step 4. Click REC button to start recording. After recording, you can click the Stop button to preview the recorded video/audio. And if you are satisfied with the recording, you can click the Save button to save it to your computer.
Record Webcam
If you need to record your computer camera, in the Video Recorder window, turn on Webcam to open your computer camera and yourself will turn up in your computer screen.
If you computer is not equipped with a built-in camera, you can connect an external webcam to your computer, and Aiseesoft Screen Recorder will detect it automatically.

Edit during Recording
Aiseesoft Screen Recorder allows you to edit video during recording. You can click the Pen icon to enable the editing features. Then you can add text, line, arrow and specific labels to the captured video.
The Caption and callout features are especially useful when you need to specify the steps in a video tutorial.

Take a Snapshot
Aiseesoft Screen Recorder not only enables you to record any video or audio on your computer, but also allows you to take a screenshot of your screen if you need to save any important information.
Step 1. Click Screen Capture option in the main interface.

Step 2. Freely set the screenshot area whether to capture an active window or a freehand area. In addition, you can also add labels like rectangle, circle, line, arrow, text, color paints to the screenshot.

Step 3. After editing, click the Save icon to save the snapshot in the format you like.
Create A Task Schedule Recording
The Task Schedule feature is specially designed for users who have no time to sit in front of the computer waiting for the whole recording task to be finished.
Step 1. In the main interface of Aiseesoft Screen Recorder, click Task Schedule at the bottom to add a scheduled task.

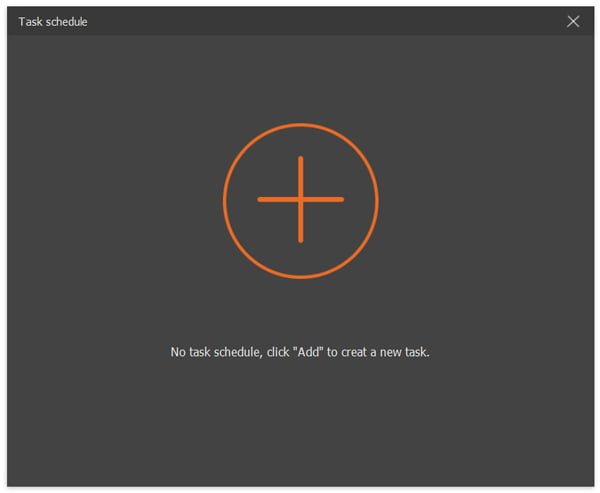
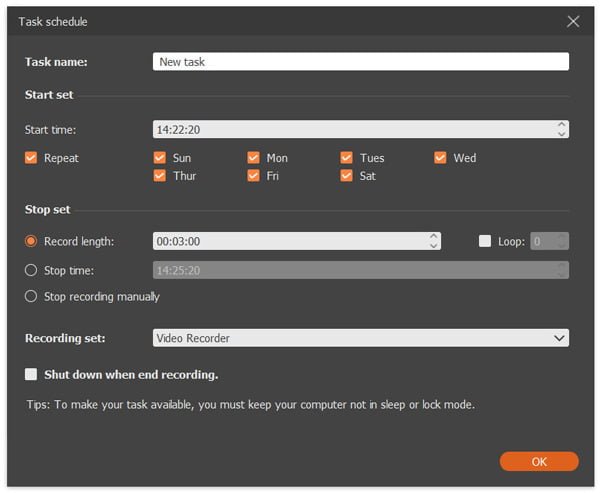
Step 2. In the Task schedule window, click the big plus add button to add a new task. You can enter a new name for the task. Click OK to move on.

Step 3. Then you can set the starting time, ending time, recording length for the scheduled task.

Create A Preset Task
You can customize a recording preset beforehand, so that you can use it on the later recordings to avoid doing the same settings every time.
Step 1. In the software home interface, click More > Manage to add a new customized recording preset.

Step 2. In the pop up window, give a name to the recording preset, and make settings for Display, Record area, Webcam, Sound, Microphone, Video format/Quality/Frame rate, Audio format/Quality according to your need.
Step 3. Finally, click Save and Apply to save the recording preset and apply it immediately.

Tips: If you want to create another one Preset task with the similar settings, you just need to repeat the step 1, and click “Get current set” to copy the settings from the first Preset task. Then you just need to adjust the settings slightly to save them as a new one.
Verdict
I have listed the main functions of Aiseesoft Screen Recorder above, according to my experience, this screen recording software has been powerful enough for my needs. Meanwhile, its simple and clean interface has made it easy to be operated.
If you are interested in any features of Aiseesoft Screen Recorder, I recommend you to download a trial version from their website for a try. It will not let you down.


