If you are looking for a platform to post videos and interact with others, then YouTube should be your first pick. Used by over a billion people, it is the biggest video-sharing platform in the world. Though, if you have never created videos in the past, then running a YouTube channel can be confusing.
In this post, I will help you with some tips regarding YouTube strategies and for using a screen recorder for PC that will make your job a whole lot easier.
A Step-by-Step Guide on Becoming Successful on YouTube
In nutshell, becoming successful on YouTube would be related to your target audience and the kind of content you post. If you have a faithful audience and they like your content, then you can easily taste success on YouTube. Here are some steps that I would recommend following to start your YouTube journey.
Step 1: Come Up with a Strategy for Your YouTube Channel
Before you start posting videos, you should consider the following things in mind to maximize the reach of your content.
-
Study your target audience
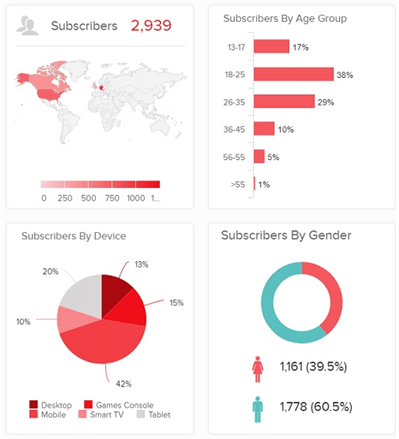
If you have been using YouTube for a while, then you can go to its Analytics page to know more about your audience. You can also know what kind of topics they are interested in. By knowing their gender, age, geography, etc. you can also think of relevant topics.
-
Find the right topics for your videos
After studying these analytics, you can try to match it with your skills to come up with engaging topics. For instance, if you are already a master in any topic like Photoshop or video editing, then you can come up with these tutorials.
If you want to market your product, then you can create demo videos for it. From travel to education, you can post videos about anything on YouTube.
-
Share and be consistent
Chances are that some of your videos might not get so many views. Therefore, you can try to share your videos on other social platforms like Twitter or Facebook. Also, keep posting videos to have an engaging community that would appreciate your efforts.
Step 2: Try and Test Video Equipment for Beginners
If you want to come up with professional videos, then you need to have the right microphone, camera, and even a screen recorder for PC.
-
Microphone
To include your voice in a video tutorial, getting a microphone would be a must. There are different kinds of microphones in the market at all price ranges. Even getting a decent microphone with a stand would improve the quality of your content easily.

-
A Reliable Screen Recorder and Video Editor
For those who like to make gameplay tutorials or lectures, a screen recording tool would be needed. You can consider trying Wondershare DemoCreator as it provides a seamless screen recording experience. Using the tool, you can also record your voice, include a webcam screen, and even edit your videos – all in one place.

-
Work on lighting
You might already know that lighting can bring a huge difference in video recordings. If you are recording people or even objects, then consider having a blank background screen (like green) and set up the right lights to focus on important objects.
Step 3: Record your Screen to Make YouTube Videos
Great! Once you have the setup, you can start recording your videos. If you are coming up with a video tutorial, then you can use Wondershare DemoCreator to record your screen. It will help you record educational video, presentation, or any other software tutorial as well.
-
Launch Wondershare DemoCreator
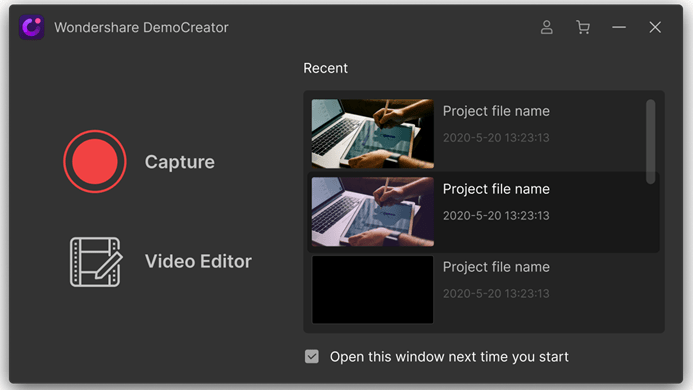
At first, you can just download and launch Wondershare DemoCreator on your system and select the option to capture the screen. From its home, you can switch between the Screen Recorder and Video Editor features.
-
Set your preferences to start recording
On DemoCreator, you can further go to the Screen Capture settings to customize how you record your videos. For instance, you can go to the Screen tab to select the area to record and at a preferred frame rate.

In the same way, you can visit the Audio and Camera tab to check the audio input or your webcam. You can also select the default input for audio/camera and further explore its advanced settings.
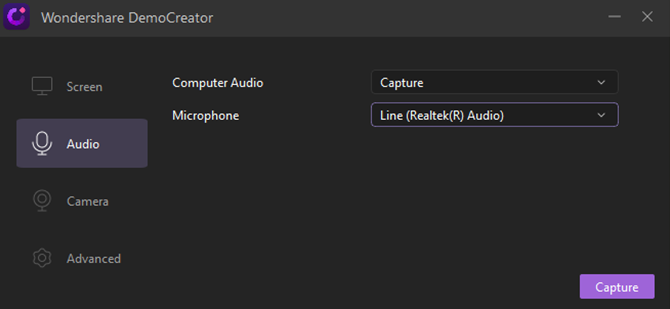
One of the best things about DemoCreator is that you can include your webcam and microphone audio with the recording of your screen.
-
Start recording
When recording with DemoCreator, you can add real-time screen drawing and use the mouse spotlight to highlight any key point on your screen clearly.

Step 4: Edit your Videos before Posting
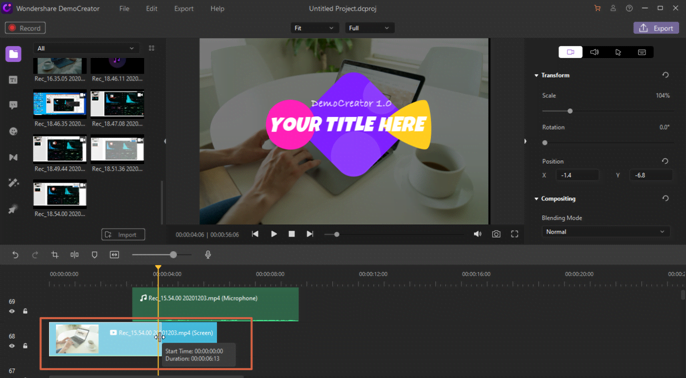
With the help of a tool like DemoCreator, you can also edit your videos (apart from recording your screen). For this, you have to first add your video to DemoCreator and drag it to the working timeline.
-
Trim or clip your videos
Once the video is added, use the clip feature to adjust the starting and ending point of the video to trim the necessary parts.
-
Include transitions and animations
From the right sidebar of DemoCreator, you can also visit the Transitions tab and implement the option of your choice.
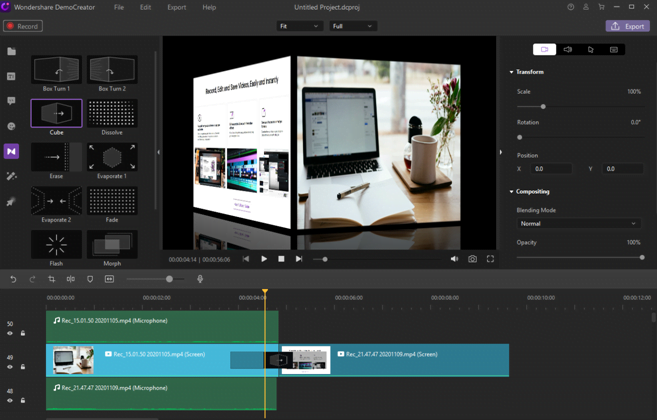
Similarly, you can also find all kinds of annotations, animations, stickers, etc. on the sidebar that you can drag-and-drop to your videos.

-
Add Texts or Captions
Under the Annotations feature in DemoCreator, you can find options to add all kinds of captions and texts to your videos.

-
Add Voiceovers or Music
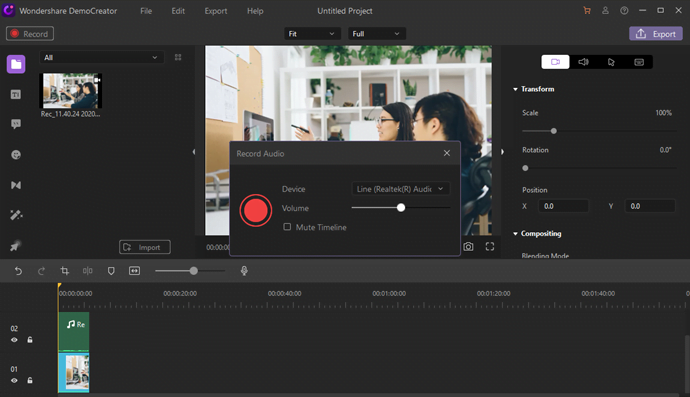
If you want, you can readily import any other audio file to DemoCreator to add music to your videos. Besides that, you can also click on the voiceover icon above the timeline to record your voice in the background for the video.
Step 5: Export your Videos and Upload it
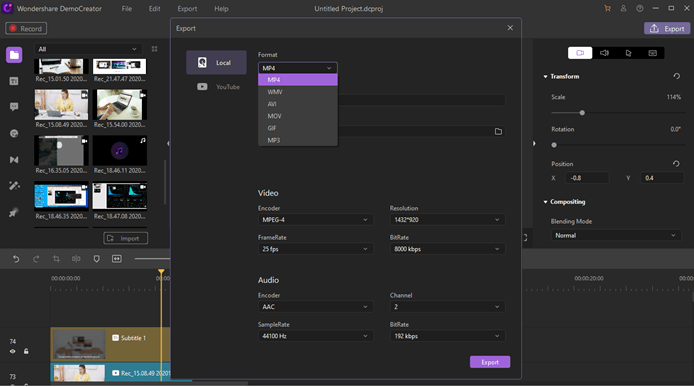
That’s it! Once you are done editing, you can go to the Export feature on DemoCreator and choose a preferred format (like MP4, AVI, WMV, etc.) to save your file. In the end, you can go to the YouTube website or app to upload your video to your channel.
That’s a wrap, folks! I’m sure that after reading this post, you would be able to know more about recording your YouTube videos.
If you want to make things easier and get better results, then you can use a screen recorder for PC (like Wondershare DemoCreator). Since it is free to download, you can try it on your own and start recording professional videos for YouTube easily.
Join 25,000+ smart readers—don’t miss out!


